
In the dynamic world of live streaming, there’s a name that resonates above all else – Twitch. Born as a gaming-focused platform, Twitch has rapidly evolved into a versatile haven for content creators across diverse genres. The platform had 6.13 billion hours of binge-worthy content in the first quarter of 2022 alone. And guess what? Twitch’s mobile app commands a whopping 73% of daily active users in the world of live streaming apps. So, grab your virtual popcorn because we’re about to uncover everything you need to know about Twitch live streaming in this comprehensive guide.
In this Article:
🎯 Understanding the Twitch Landscape
🤷♀️ What is Twitch?
Twitch officially debuted in 2011 as a gaming-centric offshoot of Justin.tv, which ultimately paved the way for the multifaceted platform we know today. Amazon’s acquisition of Twitch Interactive in 2014 heralded a new era for the platform. Twitch has since become the go-to destination for not just esports and live streaming games but also a thriving community of diverse entertainment personalities.
🪧 How to sign up on Twitch?
Creating a Twitch account is a breeze. Here is your step-by-step guide:
👉 Step 1: Familiarize Yourself with Community Guidelines
Acquaint yourself with Twitch’s community guidelines. It is essential to know the platform’s rules and expectations. Keep this page bookmarked for future reference, as it may see occasional updates.
👉 Step 2: Set Up Your Account
On your desktop, simply click the Sign-Up button and complete the form. If you are using a mobile device, download the Twitch mobile app. You will need to select a unique username, create a password, and provide your email address and date of birth. If you are signing up on mobile, Twitch recommends using your phone number initially and verifying your email address later.
👉 Step 3: Activate Two-Factor Authentication (2FA)
For security reasons, Twitch requires two-factor authentication (2FA) to go live. To enable 2FA, you will need your password and your mobile phone. Start by verifying your email address in your Twitch account’s Security and Privacy settings. Once that is done, you can activate 2FA.
✌ ️Levels of Streaming on Twitch
Content creators are called “Streamers” on Twitch. As you dive into the Twitch universe, you will discover three exciting levels of streaming:
👉 Streamer: As a Streamer, you can broadcast content, engage with your audience, access stream analytics, and nurture your fan community. To become a Twitch Affiliate and unlock exclusive features, keep an eye on your Achievements page.
👉 Affiliate: Here, you get fantastic tools like a subscription button and a custom emote. To start earning through subscriptions, Bits, game promotions, in-game items, ads, and donations, you will have to meet the criteria of 50 followers, eight hours of streaming (or seven days in 30 days), and an average of three viewers per stream.
👉 Partner: The elite tier, Twitch Partners, revel in monthly subscriptions, verified badges, custom emotes, exclusive chats, and more. To reach this summit, aim for 25 hours streamed in the last 30 days, 12 unique streaming days, and an average of 75 viewers per stream. After meeting these milestones, formalize your journey with a Twitch Partner application. Learn More
So, whether you are a Streamer, an Affiliate, or a Partner, Twitch live streaming is where your dreams and creativity take flight!
🤔 Why Live Stream on Twitch?
Twitch live streaming offers a multifaceted platform for content creators to engage with their audience and harness their passion. From engagement and interaction to endless monetization opportunities, Twitch has emerged as a hot-favorite platform for avid gamers.
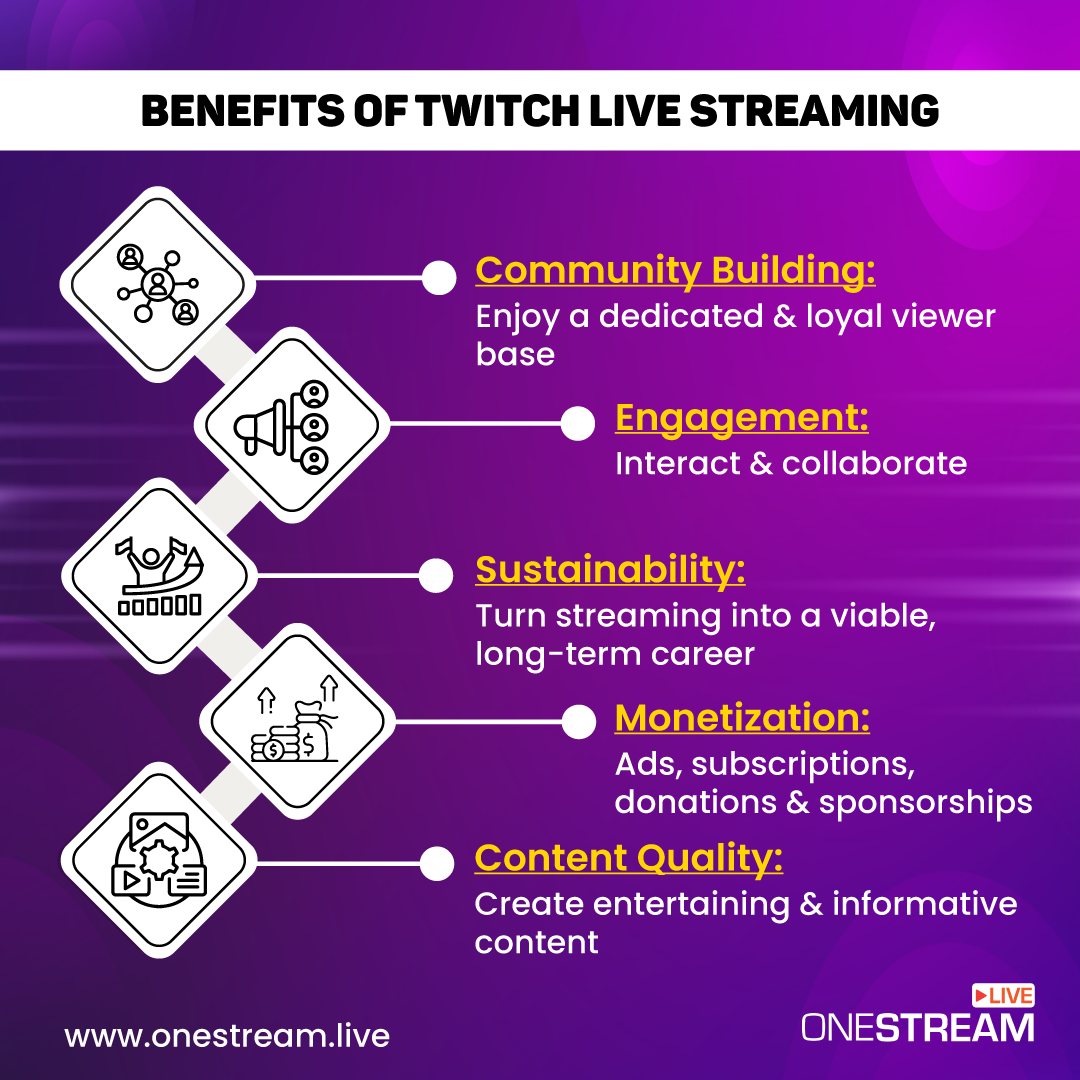
🚀 Engagement
Unlike traditional content platforms, Twitch thrives on collaboration and engagement. Streamers can directly communicate with their audience through live chat, responding to questions, comments, and suggestions instantly. This two-way interaction creates a sense of connection and closeness that is unparalleled in the digital world.
🚀 Monetization
From ads that play during your streams to subscribers who offer monthly support, and viewers who generously donate or sponsor your channel, the potential for earning on Twitch is significant. And for those with a growing fan base, sponsorships with brands in your niche can lead to lucrative partnerships.
🚀 Sustainability
Twitch, with its diverse monetization options, paves the way for streamers to achieve just that. By cultivating a dedicated community, delivering engaging content, and exploring various income streams like ads, subscribers, donations, and sponsorships, streamers can transform their Twitch channels into a sustainable career.
🚀 Content Quality
Twitch offers a dynamic platform where creators can shine by producing top-notch, entertaining, and informative content. Whether it is mastering a video game, sharing cooking tips, or hosting lively discussions, quality content is the key to captivating your audience.
🚀 Community Building
It’s not just about broadcasting; it is about fostering connections and camaraderie among your audience. By engaging with viewers in real-time chat, hosting interactive events, and showing appreciation for their support, you can transform casual viewers into passionate fans. These loyal viewers not only contribute to your success but also become a source of motivation, driving you to continue sharing your passion with the world.
🤩 Twitch Live Streaming Essentials
Twitch lays out specific requirements for successful live streaming: a robust internet connection, streaming software, a machine capable of running your content, and the necessary audio and visual peripherals.
😎 Software Recommendations
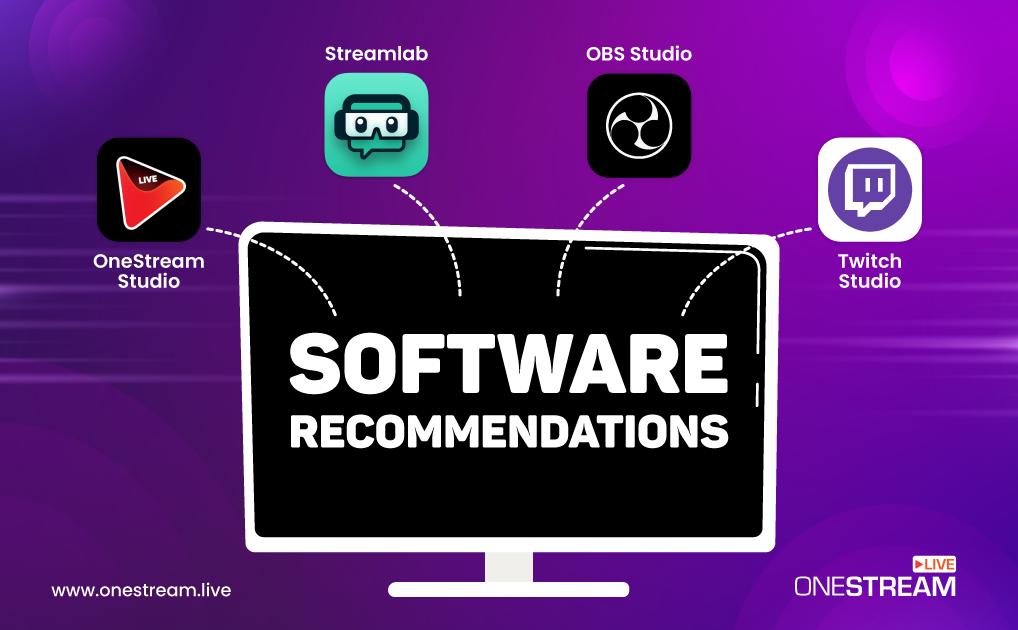
When it comes to live streaming on Twitch from a desktop computer or laptop, installing the Twitch app is not an option. In this scenario, you will require dedicated live streaming software to bring your content to the Twitch audience. The software you choose can significantly impact your streaming experience, and several noteworthy options stand out:
👉 OneStream Live Studio: A user-friendly live streaming platform that allows users to create live streams with up to 14 guests, display up to 10 of them on screen, and multistream to over 45 social media and web platforms simultaneously. It simplifies collaboration by letting users invite guests via shareable links and provides features like simultaneous streaming to multiple platforms like Twitch, Facebook, and YouTube, picture-in-picture streaming, unified chat, and copyright-free background music. OneStream Live Studio is suitable for both beginners and experienced streamers, making live streaming easy and engaging.
👉 OBS Studio: A powerful free open-source software for live streaming and video recording, offering users a range of tools to capture and broadcast audio and video from various sources. OBS Studio is favored by content creators and gamers due to its user-friendly interface and extensive customization options. While it offers extensive customization options, newcomers may find a steep learning curve.
👉 Streamlabs: Streamlabs is a user-friendly streaming software only available for Windows. It offers integrated features like alerts and chat management along with a variety of widgets and overlays, making it ideal for beginners. In contrast, OBS Studio offers more customization and control, appealing to advanced users willing to tackle a steeper learning curve. Your choice between Streamlabs and OBS Studio hinges on your experience level and specific streaming requirements.
👉 Twitch Studio: For those seeking a quick entry into the Twitch live streaming realm to test the waters, Twitch Studio, Twitch’s proprietary streaming software, is an option. Keep in mind that it’s in beta, so it comes with certain limitations. Customization options are somewhat restricted, making importing custom overlays or adding plug-ins a less straightforward process.
💻 Hardware Recommendations
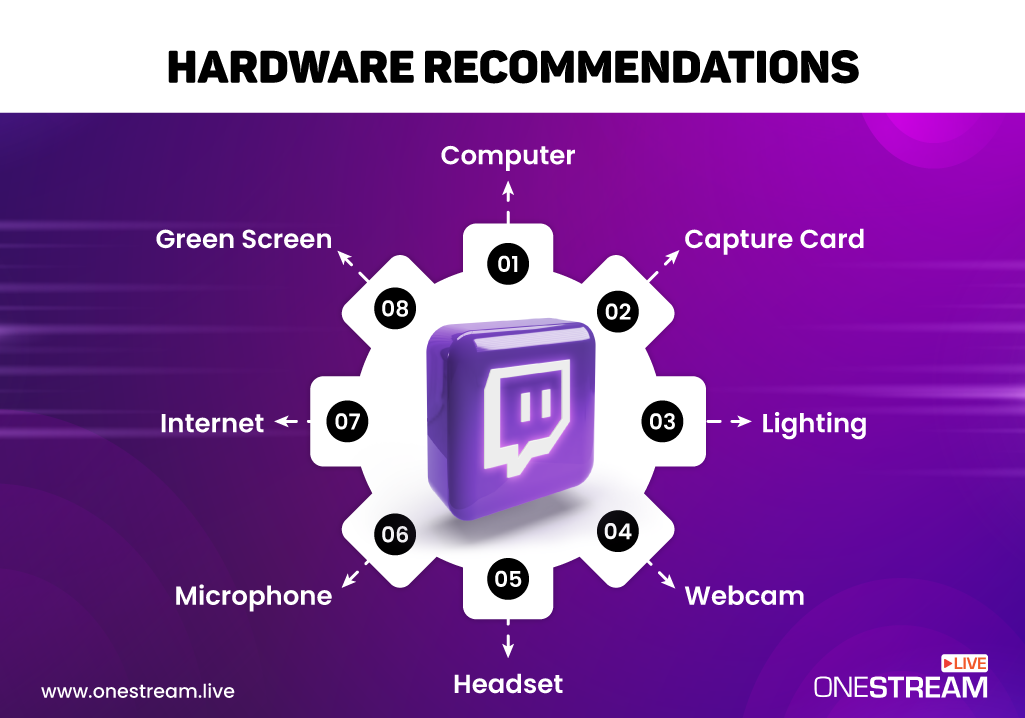
So, what kind of hardware is recommended to ensure a smooth and high-quality live streaming experience on Twitch? Let’s break down the essential components you should consider to build a streaming setup that strikes the right balance between performance, quality, and budget.
👉 Computer
To begin Twitch live streaming, you need a device to stream from. While gaming consoles like the PlayStation 4 and Xbox One, as well as smartphones, offer a straightforward entry point into the streaming world, they come with limitations. Among the options available, desktop computers stand out as the most popular choice for dedicated Twitch streaming setups. The reason is simple: they offer unparalleled control and flexibility over your stream. Some streamers even opt for a dual-computer setup, using one machine for gaming and the other for streaming. This allows for optimal performance as the gaming computer focuses solely on gameplay, while the streaming PC handles encoding and broadcasting.
👉 Microphone and Headset
Audio quality is often overlooked but plays a crucial role in engaging with your Twitch audience. A good microphone and headset are essential for clear communication and a professional stream.
- Microphone: To ensure top-notch audio quality and start live streaming on Twitch with clarity, invest in a dedicated USB or XLR microphone like the Blue Yeti, Audio-Technica AT2020, or Shure SM7B for top-notch audio quality.
- Headset: For effective game audio and seamless interaction with your viewers during Twitch live streaming, opt for a comfortable and high-quality headset. Look for features such as noise-canceling capabilities and clear audio.
👉 Webcam
Engaging with your Twitch audience on a personal level is essential, and a quality webcam is your window to achieving this connection. It is your window to the world of live streaming, allowing your viewers to see your reactions, expressions, and maybe even your occasional victory dance.
The most recommended webcams for Twitch live streaming include Logitech C920 and C922, Logitech C930e, Razer Kiyo, Microsoft LifeCam Studio, Sony PlayStation Eye, and GoPro Hero Series. If you already own a DSLR camera, you can also transform it into a high-quality webcam with the help of software and a capture card. It is a great way to leverage your existing camera equipment and enhance your Twitch live streaming setup.
👉 Capture Card (For Consoles)
If you are planning to stream console games, a capture card is necessary to connect your console to your computer, allowing you to stream on Twitch from consoles or smartphones. Elgato and AVerMedia offer reliable capture card options that can capture gameplay in high resolution.
👉 Lighting and Green Screen
Good lighting can significantly improve your stream’s video quality. Soft, even lighting reduces shadows and enhances your on-screen presence. Consider investing in LED ring lights or softbox lighting kits to improve your Twitch live streaming setup. If you want to remove your background or use overlays, a green screen can help achieve a polished look.
👉 Internet Connection
A stable and high-speed internet connection is crucial for smooth Twitch live streaming. Twitch recommends an upload speed of at least 6 Mbps for a 720p stream and a bit rate of 4,500-6,000 Kbps when streaming on Twitch. Consider a wired Ethernet connection for the most reliable performance. Master streaming on Twitch by ensuring a strong internet connection.
🛃 How to Live Stream on Twitch?
👩💻Stream on Twitch from a Desktop
👉 Step 1: Connect Twitch with OneStream Live Studio
OneStream Live Studio simplifies the process of Twitch live streaming, eliminating the need for complicated software installations.
To connect your stream to Twitch using OneStream Live, follow these steps:
- Start by logging into your OneStream Live account or creating a new one.
- In your OneStream Live dashboard, click “Connect.”
- From the list of platforms, select “Twitch.”
- You will be prompted to connect to your Twitch account. Enter your Twitch credentials and grant OneStream Live permission to access your Twitch account.
👉 Step 2: Configure Stream Settings
Stream settings, as well as hardware for Twitch live streaming, are crucial for a successful Twitch stream, encompassing factors such as resolution, frame rate, bitrate, and audio quality. These settings depend on variables like your available upload bandwidth, your computer’s processing power, and the nature of your content.
💪 Pro-Tip: Consult Twitch’s recommended stream settings and fine-tune them based on your hardware capabilities for Twitch live streaming to ensure a seamless streaming experience.
👉 Step 3: Start Streaming
You are ready to go live.
💪 Pro-Tip: Did you know you can customize your Twitch live streams using OneStream Studio? Personalize your Twitch stream by adding creative overlays such as custom backgrounds, banners and tickers, professional logos, intros and outros, and much more.
🎮 Stream on Twitch from a PS4 Console
If you are eager to showcase your gaming skills to the world, Twitch offers an excellent platform for live streaming on Twitch from a PS4. Streaming directly from your PlayStation 4 to Twitch is a seamless process, and with OneStream Live, it is even easier.
👉 Step 1: Prepare your PS4 for Live Streaming
- Disable HDCP: In the PS4 settings, navigate to System and ensure that HDCP is turned off.
- Configure Your Devices: Head to the Devices section in Settings to set up your audio devices and PlayStation Camera. Adjust microphone and headset levels as needed. Please note that PS4 is compatible only with the PlayStation Camera; external webcams will not work.
- Enable Audio Sharing: Launch the game you want to stream, press the Share button on your controller, and access Sharing and Broadcast Settings > Broadcast Settings > Advanced Settings > Audio Sharing Settings. Here, you can enable microphone audio for your stream.
- Activate Chat: To ensure viewer interaction, go to Sharing and Broadcast Settings > Broadcast Settings > Advanced Settings and check the options for Display Messages to Spectators and Spectators’ Comments.
👉 Step 2: Link Your PS4 to Your Twitch Account via OneStream Live:
- Press the Share button on your controller to access broadcast options.
- Select the platform for your stream, and opt for Twitch.
- Follow the prompts to link your PS4 to your Twitch account. You can do this in one of two ways:
- Scan a QR code displayed on your screen using a mobile device.
- Visit twitch.tv/activate from a computer or smartphone and enter the code displayed on your PS4 screen.
👉 Step 3: Start Streaming
With your PS4 linked to Twitch through OneStream Live, finalize your settings such as stream title and description, and you are ready to go live.
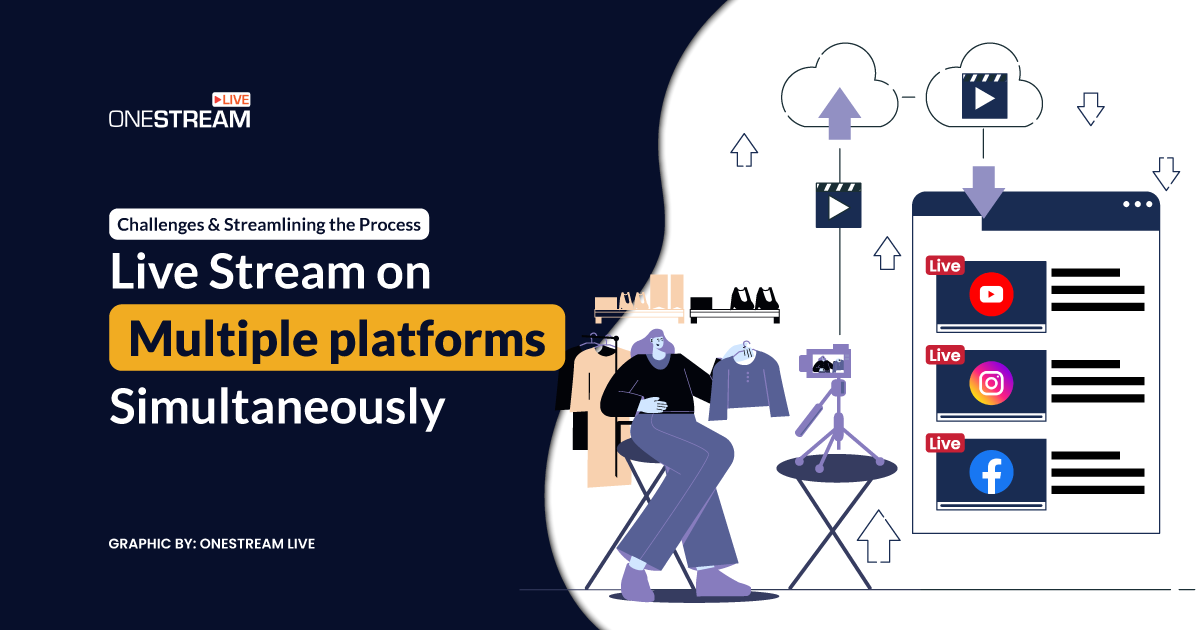
💪 Pro-tip: For wider exposure, consider streaming on multiple platforms alongside Twitch live streaming. With OneStream Live, you can seamlessly broadcast your Twitch stream to up to 30 different platforms alongside Twitch, expanding your reach and connecting with diverse communities.
🕹️ Stream on Twitch from an Xbox Console
If you are an avid gamer looking to broadcast your Xbox gameplay on Twitch, you will need to go the extra mile since Xbox does not offer native Twitch support. Here is a step-by-step guide on how to get started:
👉 Step 1: Install the Twitch App on your Xbox Console
To begin your Twitch streaming journey from your Xbox, you will first need to install the official Twitch app:
- Open the Xbox Store on your console.
- Search for the official Twitch app.
- Download and install the Twitch app on your Xbox.
👉 Step 2: Link your Twitch App to Your Account
Now that you have the Twitch app installed, you will need to connect it to your Twitch account.
- Launch the Twitch app on your Xbox for the first time.
- You will be presented with a unique six-digit code on your screen.
- Using a computer or smartphone, go to twitch.tv/activate.
- Enter the six-digit code displayed on your Xbox to link your Twitch account with the app.
👉 Step 3: Configure Xbox Settings
Before you start your Twitch live stream, ensure that your streaming setup is in order. You can use standard webcams, external microphones, and headsets with your Xbox:
- Connect your chosen devices to your Xbox.
- Access the Xbox settings and ensure that your microphone and webcam are enabled.
- Fine-tune your settings by going to Settings > Account > Privacy and Online Safety > Xbox Live Privacy > View Details and Customize. Here, you will want to:
- Allow “You can broadcast gameplay” and “You can share content made using Kinect or another camera” options under Game Content.
- Under Online Status and History, select “Everybody” for “Others can see if you are online.”
👉 Step 4: Start Streaming
With the Twitch app connected and your devices ready, you are almost set to start streaming on Twitch from an Xbox. finalize your settings such as stream title and description, launch the game you want to play, and you are ready to go live.
🎮 Stream on Twitch from Nintendo Switch
Are you looking to master streaming on Twitch from a Nintendo Switch? We have got you covered with all the information on how to stream on Twitch from a Nintendo Switch using the right hardware for Twitch live streaming.Streaming from your Nintendo Switch to Twitch requires a capture card and the following steps:
👉 Step 1: Install OBS Studio
To live stream on Twitch from a Nintendo Switch, download and install OBS Studio or Streamlabs. Both are free and excellent choices for streaming.
👉 Step 2: Set Up the Hardware
- Dock your Nintendo Switch.
- Disconnect the HDMI cable that connects the Switch to your monitor.
- Plug this HDMI cable into your capture card.
- Connect another HDMI cable to the capture card’s HDMI Out port.
- Insert the other end of this cable into your monitor’s HDMI port.
👉 Step 3: Configure OBS Studio and Link to Twitch
- Visit the official Twitch website and log in to your Twitch account.
- Go to your user profile and click on “Account Settings.”
- Choose “Channel And Videos” and locate something called “Primary Stream Key.” Copy this key.
- Open OBS Studio and click on “File.”
- Select “Settings” and then choose “Stream.”
- Enable the Twitch option and paste the copied stream key into the text box.
- Confirm your choice, and now you should be ready to stream on Twitch.
👉 Step 4: Add the Nintendo Switch Feed
- In OBS Studio, right-click anywhere in the Sources section.
- Click on “Add” and then choose “Video Capture Device.”
- Give this layer a name for reference.
- Select the newly created layer and find your capture card from the list.
- Once confirmed, a live feed of your Nintendo Switch’s gameplay will appear.
- You can adjust the position and size of this feed as needed.
👉 Step 5: Start Streaming
When you are ready to start your stream, click on “Start Streaming” in OBS Studio. Before broadcasting, OBS Studio allows you to adjust volume levels at the bottom of the window.
📲 Stream on Twitch from a Smartphone
If you’re looking to stream on Twitch directly from your smartphone, it is a bit different from streaming on other devices. The Twitch mobile app primarily allows broadcasting from your phone’s camera. Here is how you can go live on Twitch from your smartphone.
👉 Step 1: Download and Install the Twitch Mobile App
To get started, you will need the official Twitch app on your smartphone. Follow these steps:
- Open your device’s app store, whether it is the Play Store (for Android) or the App Store (for iOS).
- Search for the “Twitch” app.
- Download and install the Twitch app on your smartphone.
👉 Step 2: Log in to the App and Setup Your Profile
Once you have the app installed, log in to your Twitch account. If you have Two-Factor Authentication (2FA) enabled on your Twitch account, you will need to go through the verification process. In the upper left-hand corner of the app, tap on your profile image button. This will open your profile settings.
👉 Step 3: Tap “Go Live”
Within your profile settings, you will find the “Go Live” button. Tap on it to start the setup process.
👉 Step 4: Configure Your Stream
Before going live, there are a few things you need to do:
- Give your stream a title and description
- Select a content category from the drop-down menu
- Choose your camera
- Share your stream link
👉 Step 5: Start Streaming
Once you have completed these setup steps, you are almost ready to go live. All that is left is to press the “Start Stream” button. Before doing so, ensure that you have granted the app access to your camera and microphone, as required for live streaming.
🎯 Tips for Twitch Live Streaming
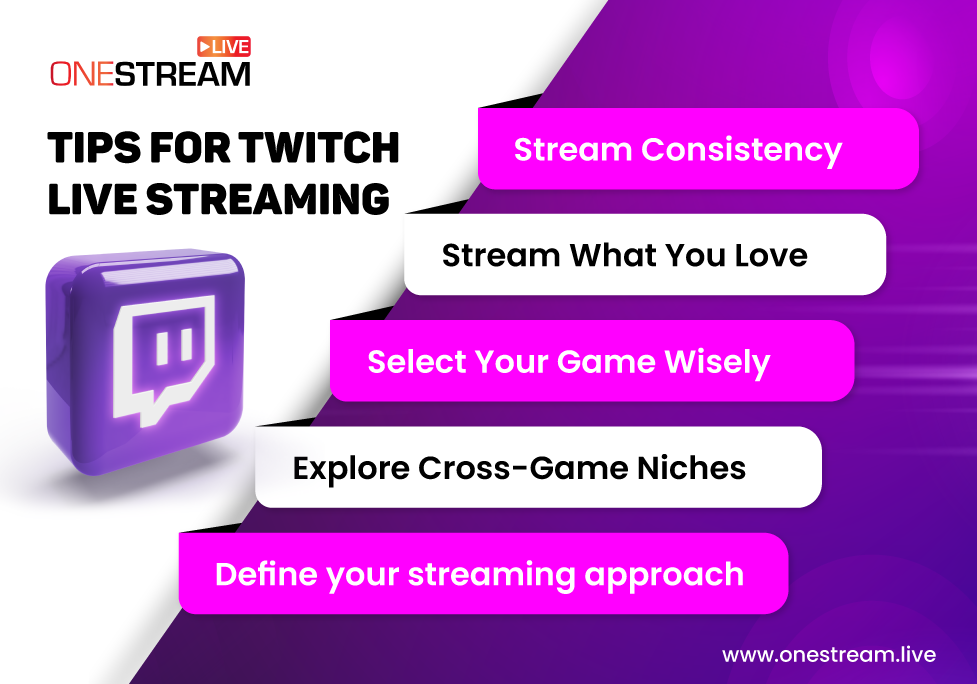
When it comes to content on Twitch, gaming has traditionally been the star of the show. However, the platform has evolved, and there are more avenues for content creation than ever before. Here are some tips to help you discover your niche and succeed on Twitch.
🚀 Define your streaming approach: Choose between a versatile approach or specialized content. Variety streamers appeal broadly, while specialization demands expertise.
🚀 Stream What You Love: Start with content you are passionate about to engage viewers genuinely.
🚀 Select Your Game Wisely: Balance popularity with competition when choosing games. Learn how to live stream on Twitch effectively.
🚀 Explore Cross-Game Niches: Explore diverse content areas like speed running, competitive gaming, or community-building.
🚀 Stream Consistency: Maintain a streaming schedule for audience growth and retention.
👋 Wrap-Up: Master Streaming on Twitch
Today, Twitch is the undisputed superstar in this galaxy of live streaming. It is like the cosmic hub with content spanning gaming to ASMR and even full-body makeup tutorials. Learning how to stream on Twitch is practically a “rite of passage” for budding content creators. But hold on to your streaming hats because there is a lot more to explore! Twitch is not the only star in the streaming constellation. Many of the secrets to thriving on Twitch are universal and can propel you to stardom on other platforms as well. OneStream Live is your trusty spaceship navigating the cosmic waves of streaming possibilities. Whether you want to live stream on Twitch from a desktop, console, or smartphone, this versatile solution has you covered.
OneStream Live Image Gallery
OneStream Live is a cloud-based live streaming solution to create, schedule, and multistream professional-looking live streams across 45+ social media platforms and the web simultaneously. For content-related queries and feedback, write to us at [email protected]. You’re also welcome to Write for Us!